This post contains affiliate links. If you make a purchase through links on our site, I may earn a small commission. Click to see full details of my Privacy Policy.
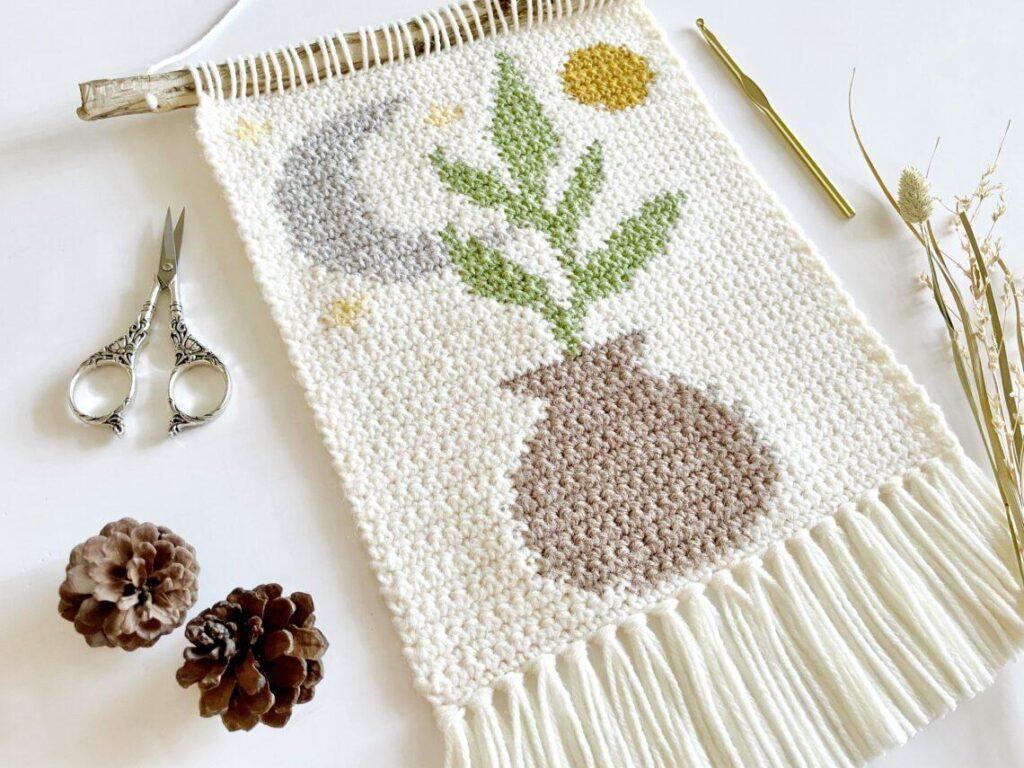
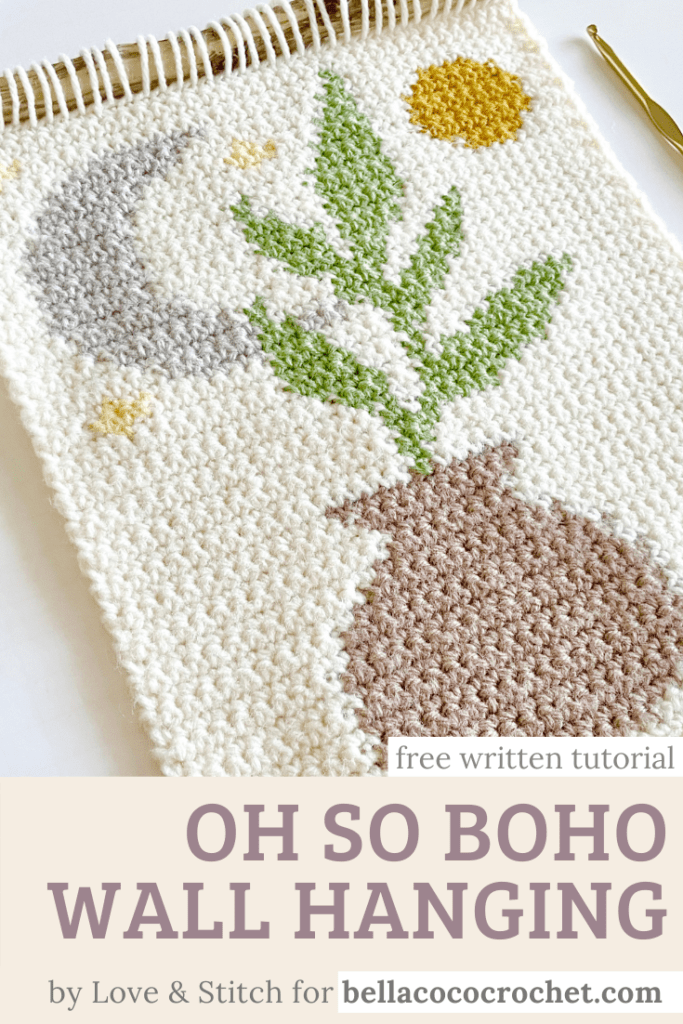
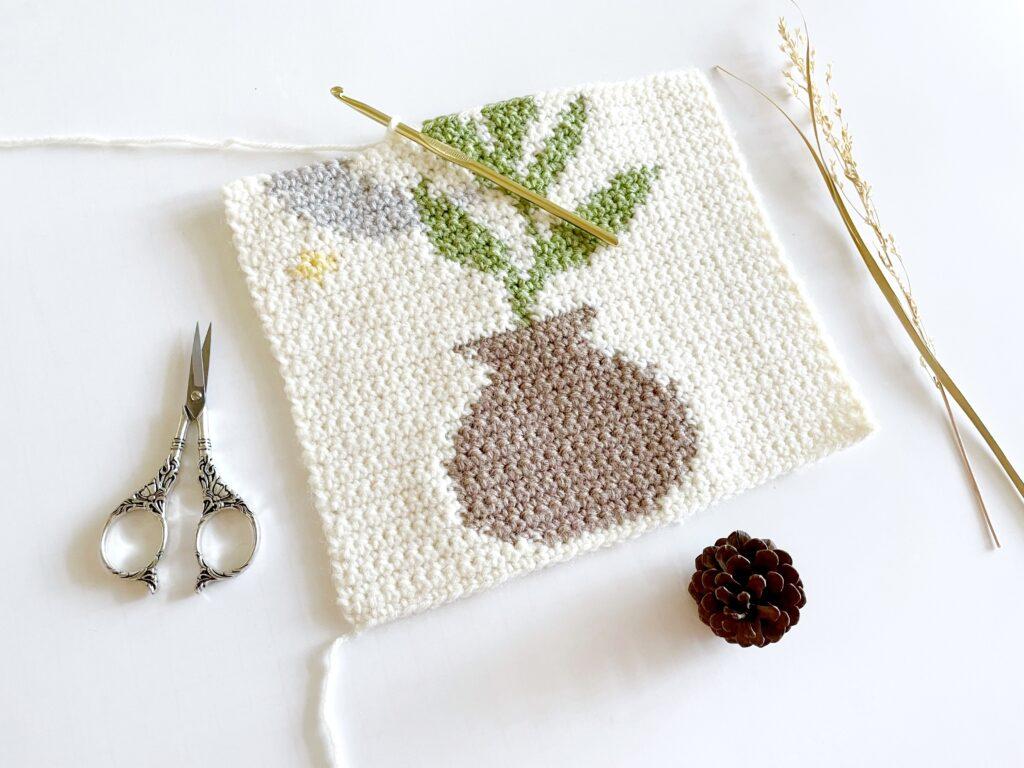
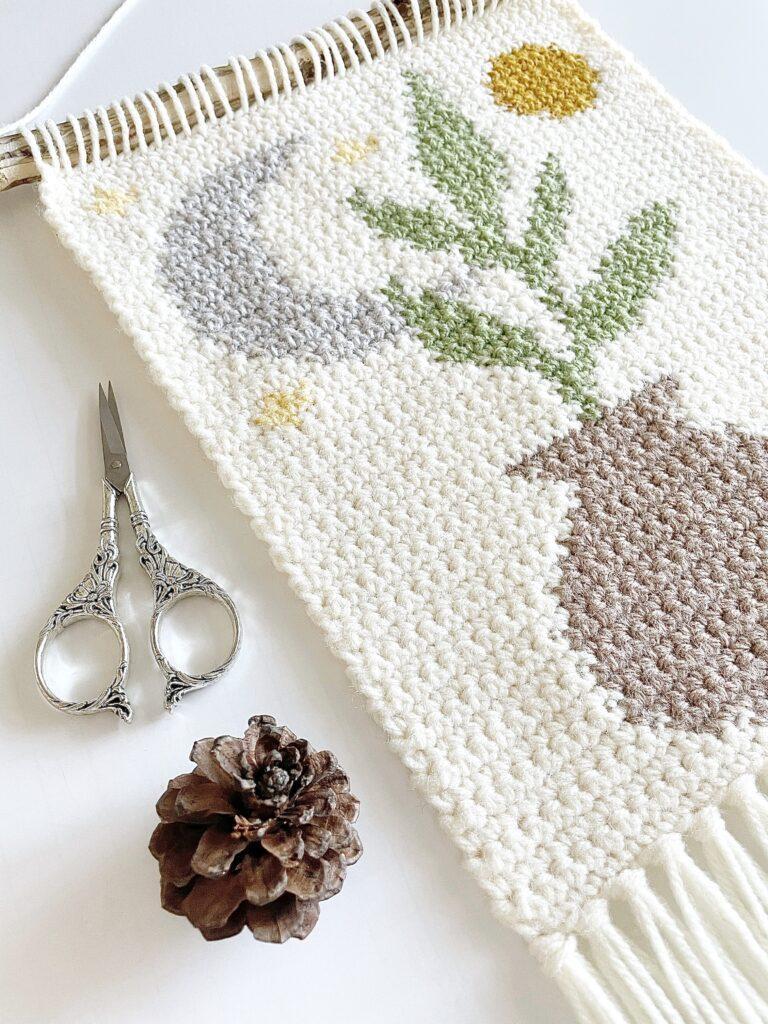
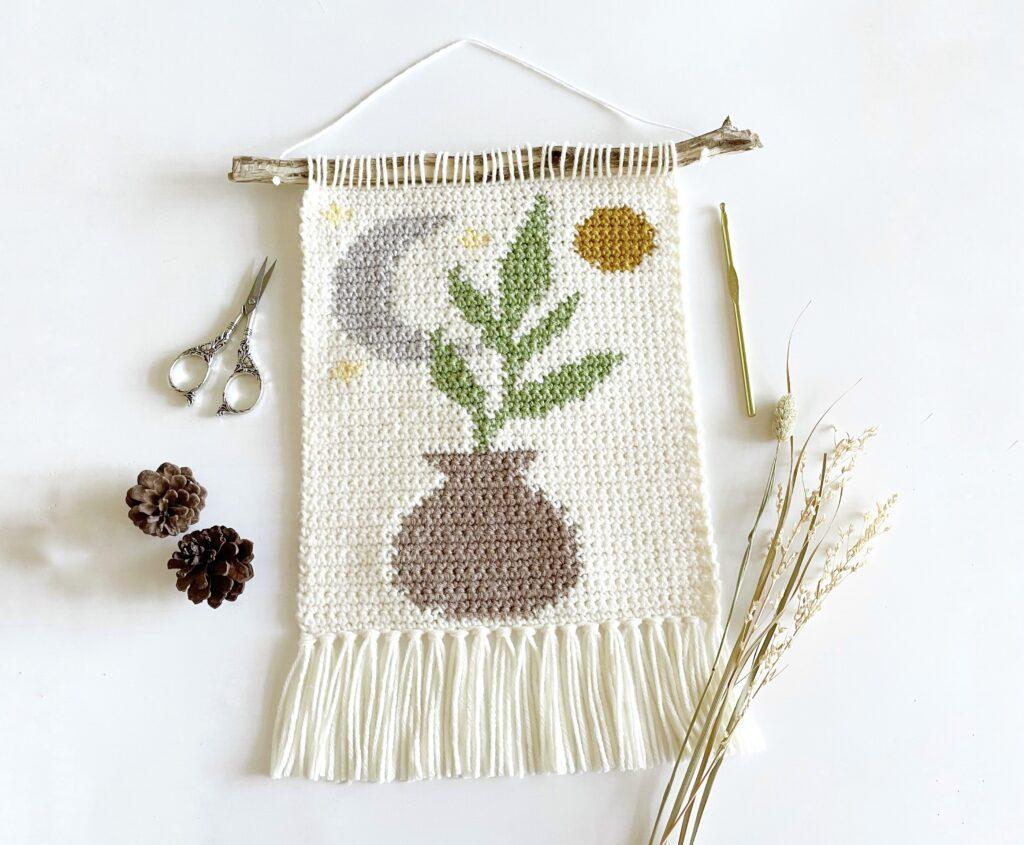
Crochet this beautiful boho wall hanging by guest designer Amanda of Love and Stitch. Add some modern textile art to your walls with this free step-by-step pattern. This pattern is intermediate but why not give it a go if you want to try a new technique, tapestry crochet. If you’ve never tried tapestry crochet don’t worry I have an assisting video tutorial to help you practice changing yarn colours.
As this is a guest post, Bella Coco Crochet is unable to answer any queries. If you have a question, please contact the designer directly and they will be happy to help you.
 Tapestry Crochet Wall Hanging
A message from the designer: Amanda
“This pattern was designed with the boho plant lover in mind. If you are as terrible at keeping plants alive as I am (lol) this is the perfect alternative!“
Need some help with yarn changing? I have a video for it!
Pin For Later
Pattern Notes
- The wall hanging is worked in rows.
- The wall hanging is worked from the bottom up.
- 1st stitch of each row should be placed into the same stitch as the turning chain.
- T]urning chain does not count as the 1st stitch of the row.
- Written in US terms.
- The pattern is written as: # of single crochet stitches (color abbreviation), example: 8(A) means 8 sc in the color Aran.
GAUGE & SIZE
Gauge does not matter too much with this pattern as long as you are trimming your tree branch/dowel rod to size.
To meet my exact dimensions refer to the following gauge: 15 sts x 18 rows = 4 inch square worked in single crochet.
10 inches wide x 11.5 inches long (not including fringe)
Terms & Abbreviations
- Chain (ch): yarn over, pull through loop on hook
- Single crochet (sc): Insert your hook into the chain or stitch, yarn over and pull through (you will have two loops on the hook) yarn over and pull the yarn through both loops on the hook.
- Stitches (sts) each individual stitch within a row
Colour Abbreviations
A = Aran
ST = Soft Taupe
F = Fern
B = Butterscotch
P = Putty
G = Gold
 How to Crochet – A Handy Reference Guide eBook
Unsure of the differences between UK and US terms? Need a refresher on how to do your crochet stitches? In my ‘How to crochet: A handy reference guide’ EBook I help you with all of these terms and you can always have them to hand! You will also get exclusive access to free video instructions. You can find my EBook HERE.
Assisting Tutorial
This pattern requires you to change colour, I have a video tutorial to help you with this technique before you start the pattern.
How To Do a Seamless Colour Change
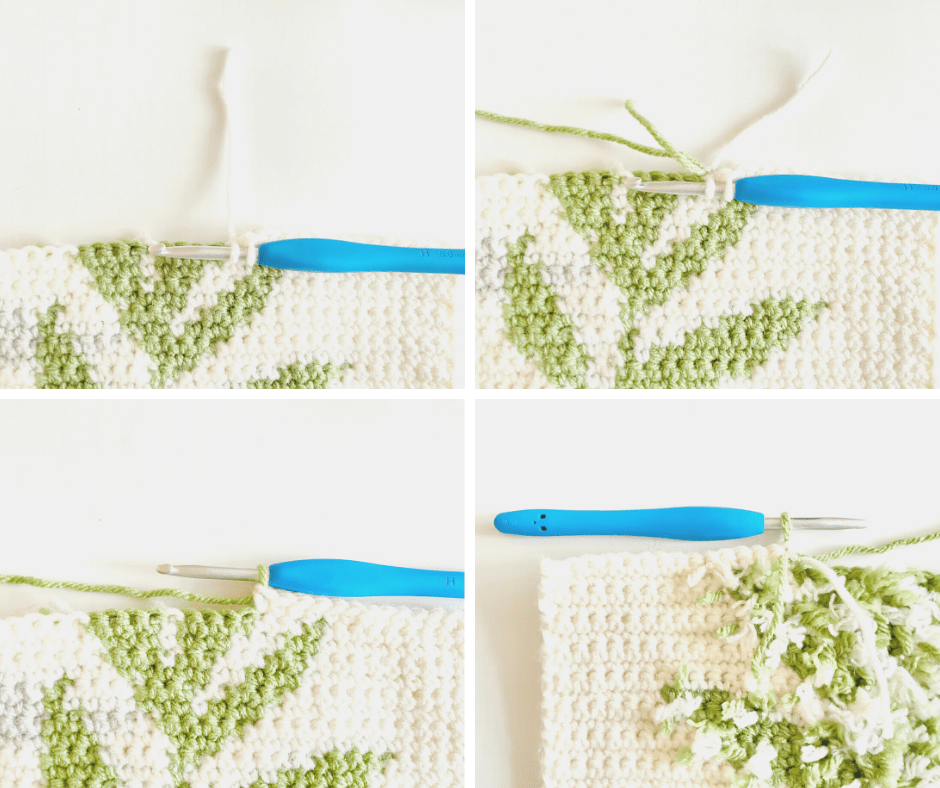
Cut and Tie Colour Changing Method
When working the wrong side, be sure to pull your ties through to the wrong side. Tighten and trim your ties after completing the project.
 Bella Coco Homeware Collection E-Book
Free Pattern: Crochet Wall Hanging
Pattern Chart
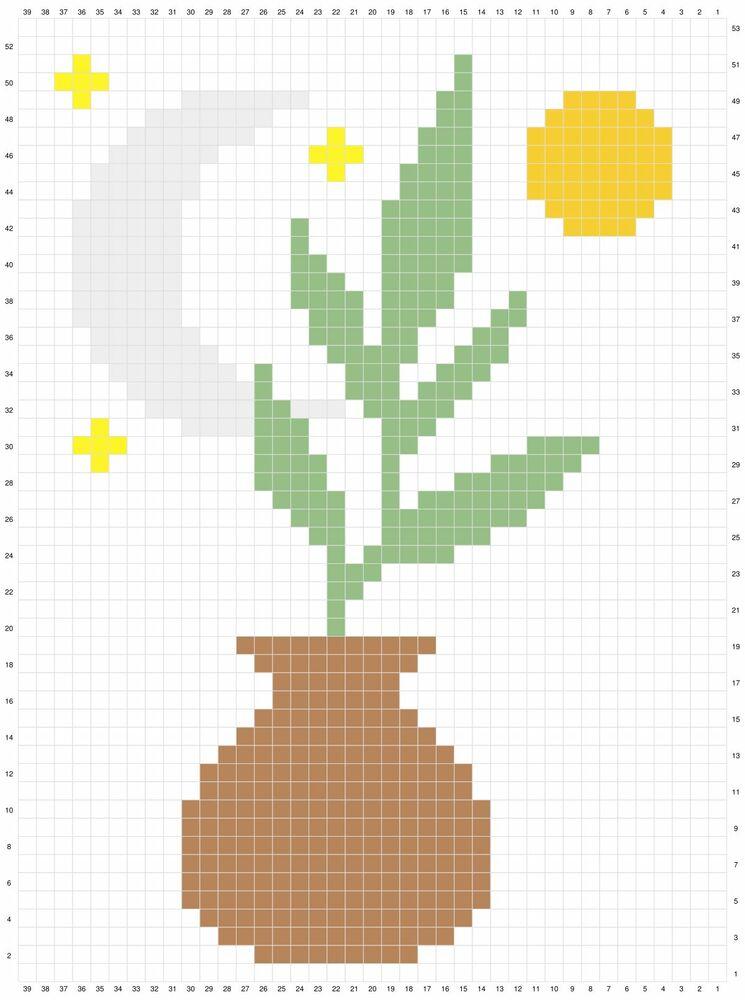
Written Pattern
- Ch 40 in Aran
- Row 1: sc in the 2nd ch from the hook and in each ch across. Ch 1, turn. (39)
- Row 2: 13 (A), 9 (ST), 17 (A). Ch 1, turn. (39)
- Row 3: 15 (A), 13 (ST), 11 (A). Ch 1, turn. (39)
- Row 4: 10 (A), 15 (ST), 14 (A). Ch 1, turn. (39)
- Row 5: 13 (A), 17 (ST), 9 (A). Ch 1, turn. (39)
- Row 6: 9 (A), 17 (ST), 13 (A). Ch 1, turn. (39)
- Row 7: 13 (A), 17 (ST), 9 (A). Ch 1, turn. (39)
- Row 8: 9 (A), 17 (ST), 13 (A). Ch 1, turn. (39)
- Row 9: 13 (A), 17 (ST), 9 (A). Ch 1, turn. (39)
- Row 10: 9 (A), 17 (ST), 13 (A). Ch 1, turn. (39)
11- 19
- Row 11: 14 (A), 15 (ST), 10 (A). Ch 1, turn. (39)
- Row 12: 10 (A), 15 (ST), 14 (A). Ch 1, turn. (39)
- Row 13: 15 (A), 13 (ST), 11 (A). Ch 1, turn. (39)
- Row 14: 12 (A), 11 (ST), 16 (A). Ch 1, turn. (39)
- Row 15: 17 (A), 9 (ST), 13 (A). Ch 1, turn. (39)
- Row 16: 14 (A), 7 (ST), 18 (A). Ch 1, turn. (39)
- Row 17: 18 (A), 7 (ST), 14 (A). Ch 1, turn. (39)
- Row 18: 13 (A), 9 (ST), 17 (A). Ch 1, turn. (39)
- Row 19: 16 (A), 11 (ST), 12 (A). Ch 1, turn. (39)
20 -32
- Row 20: 17 (A), 1 (F), 21 (A). Ch 1, turn. (39)
- Row 21: 21 (A), 1 (F), 17 (A). CH 1, turn. (39)
- Row 22: 17 (A), 2 (F), 20 (A). Ch 1, turn. (39)
- Row 23: 19 (A), 3 (F), 17 (A). Ch 1, turn. (39)
- Row 24: 17 (A), 1 (F), 1 (A), 5 (F), 15 (A). Ch 1, turn. (39)
- Row 25: 13 (A), 6 (F), 2 (A), 2 (F), 16 (A). Ch 1, turn. (39)
- Row 26: 15 (A), 3 (F), 2 (A), 8 (F), 11 (A). Ch 1, turn. (39)
- Row 27: 10 (A), 7 (F), 1 (A), 1 (F), 2 (A), 4 (F), 14 (A). Ch 1, turn. (39)
- Row 28: 13 (A), 4 (F), 3 (A), 1 (F), 3 (A), 6 (F), 9 (A). Ch 1, turn. (39)
- Row 29: 8 (A), 5 (F), 5 (A), 1 (F), 3 (A), 4 (F), 8 (A), 1 (B), 4 (A). Ch 1, turn. (39)
- Row 30: 3 (A), 3 (B), 7 (A), 3 (F), 4 (A), 2 (F), 6 (A), 4 (F), 7 (A). Ch 1, turn. (39)
- Row 31: 16 (A), 3 (F), 4 (A), 3 (F), 4 (P), 4 (A), 1 (B), 4 (A). Ch 1, turn. (39)
- Row 32: 7 (A), 6 (P), 2 (F), 3 (P), 1 (A), 5 (F), 15 (A). Ch 1, turn. (39)
33 -44
- Row 33: 14 (A), 3 (F), 1 (A), 3 (F), 4 (A), 1 (F), 7 (P), 6 (A). Ch 1, turn. (39)
- Row 34: 5 (A), 7 (P), 1 (A), 1 (F), 4 (A), 3 (F), 2 (A), 3 (F), 13 (A). Ch 1, turn. (39)
- Row 35: 12 (A), 3 (F), 2 (A), 5 (F), 6 (A), 7 (P), 4 (A). Ch 1, turn. (39)
- Row 36: 4 (A), 6 (P), 6 (A), 3 (F), 1 (A), 2 (F), 3 (A), 2 (F), 12 (A). Ch 1, turn. (39)
- Row 37: 11 (A), 2 (F), 3 (A), 3 (F), 1 (A), 3 (F), 7 (A), 6 (P), 3 (A). Ch 1, turn. (39)
- Row 38: 3 (A), 6 (P), 6 (A), 4 (F), 1 (A), 4 (F), 3 (A), 1 (F), 11 (A). Ch 1, turn. (39)
- Row 39: 15 (A), 4 (F), 2 (A), 3 (F), 6 (A), 6 (P), 3 (A). Ch 1, turn. (39)
- Row 40: 3 (A), 6 (P), 6 (A), 2 (F), 3 (A), 5 (F), 14 (A). Ch 1, turn. (39)
- Row 41: 14 (A), 5 (F), 4 (A), 1 (F), 6 (A), 6 (P), 3 (A). Ch 1, turn. (39)
- Row 42: 3 (A), 6 (P), 6 (A), 1 (F), 4 (A), 5 (F), 5 (A), 4 (G), 5 (A). Ch 1, turn. (39)
- Row 43: 4 (A), 6 (G), 4 (A), 5 (F), 11 (A), 6 (P), 3 (A). Ch 1, turn. (39)
44 – 50
- Row 44: 4 (A), 6 (P), 11 (A), 4 (F), 3 (A), 8 (G), 3 (A). Ch 1, turn. (39)
- Row 45: 3 (A), 8 (G), 3 (A), 4 (F), 3 (A), 1 (B), 7 (A), 6 (P), 4 (A). Ch 1, turn. (39)
- Row 46: 5 (A), 6 (P), 5 (A), 3 (B), 3 (A), 3 (F), 3 (A), 8 (G), 3 (A). Ch 1, turn. (39)
- Row 47: 3 (A), 8 (G), 3 (A), 3 (F), 4 (A), 1 (B), 4 (A), 7 (P), 6 (A). Ch 1, turn. (39)
- Row 48: 7 (A), 7 (P), 9 (A), 2 (F), 4 (A), 6 (G), 4 (A). Ch 1, turn. (39)
- Row 49: 5 (A), 4 (G), 5 (A), 2 (F), 7 (A), 7 (P), 5 (A), 1 (B), 3 (A). Ch 1, turn. (39)
- Row 50: 2 (A), 3 (B), 19 (A), 1 (F), 14 (A). Ch, turn. (39)
51 – 53
- Row 51: 14 (A), 1 (F), 20 (A), 1 (B), 3 (A). Ch 1, turn. (39)
- Row 52: 39 (A). Ch 1, turn. (39)
- Row 53: 39 (A). Ch 1, turn. (39)
- Fasten off leaving at least a 3 foot tail.
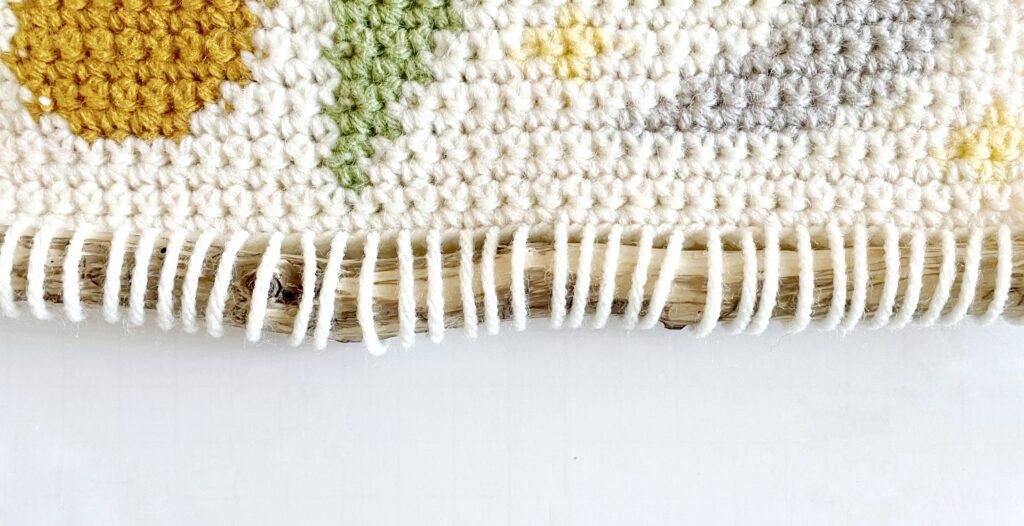
Adding the Dowel
- To attach the project to the dowel rod or tree branch; using a yarn needle, weave the tail over the dowel/branch and back under into the 1st stitch on the top of the wall hanging.

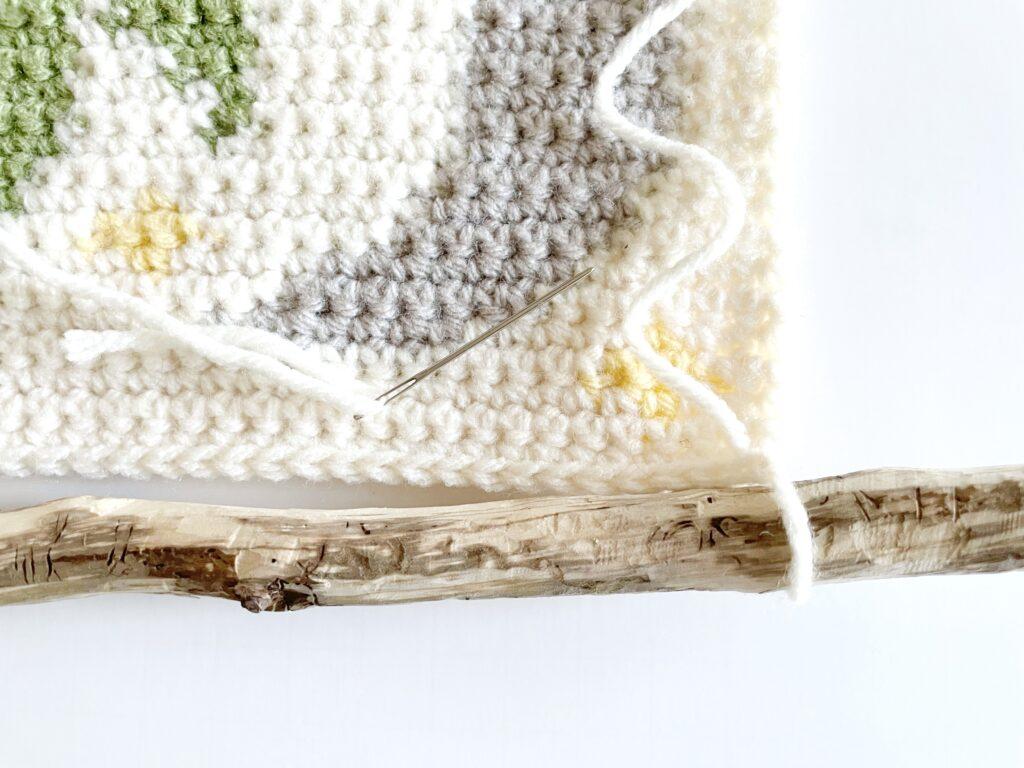
- Repeat for each stitch on top of the wall hanging. Knot off and weave in your ends.
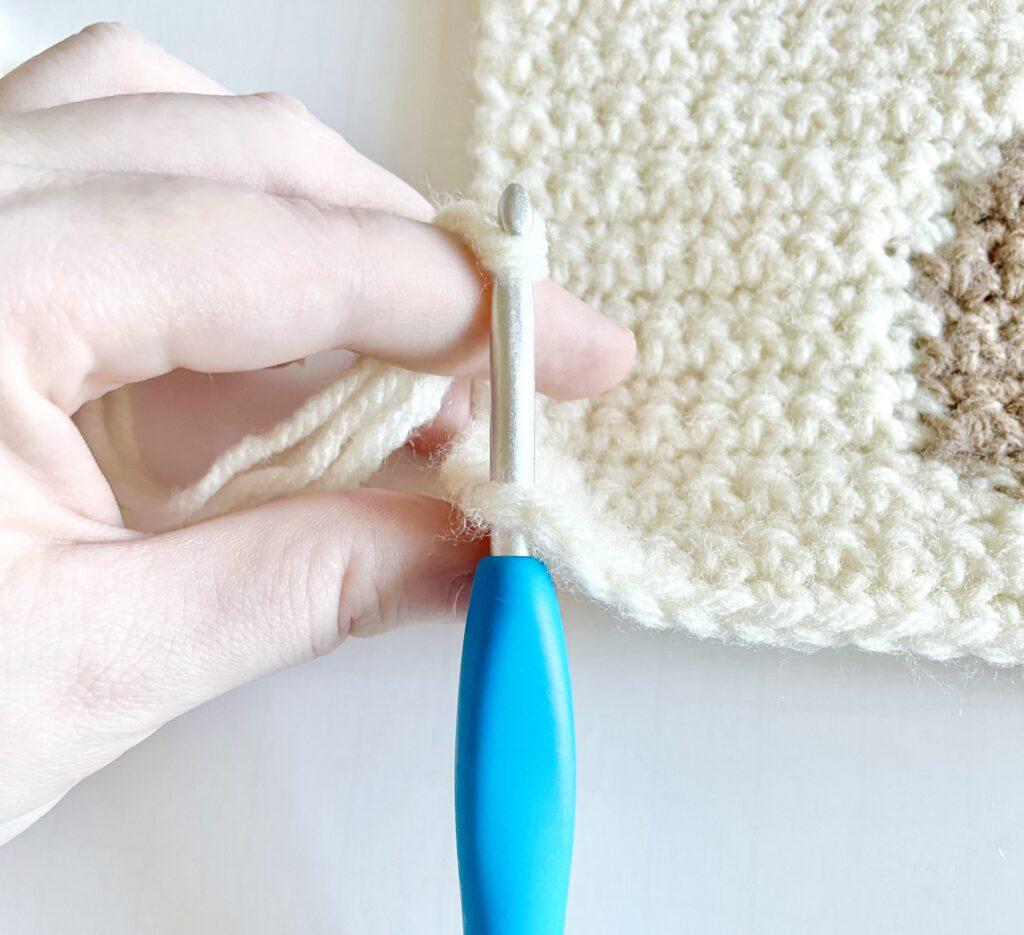
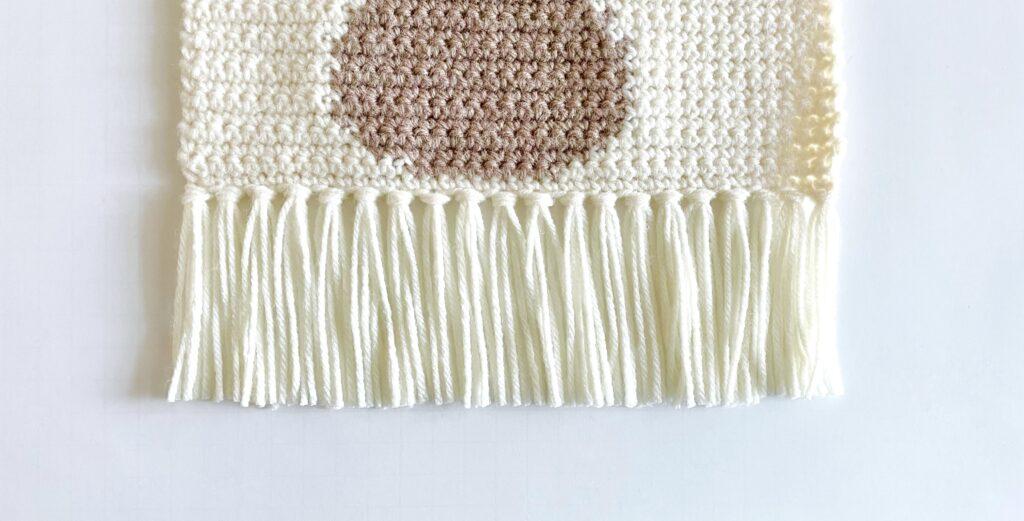
Attaching the Fringe
- Cut 12 inch pieces of yarn in Aran. You will need 3 strands to complete 1 fringe.
- To attach the fringe, grab 3 strands of yarn. Use a crochet hook to push through the far left foundation chain. Fold 3 strands in half and loop the middle of the strands onto the crochet hook and pull the loop of strands through the chain about 2 inches.
- Fold the strands through the loop.
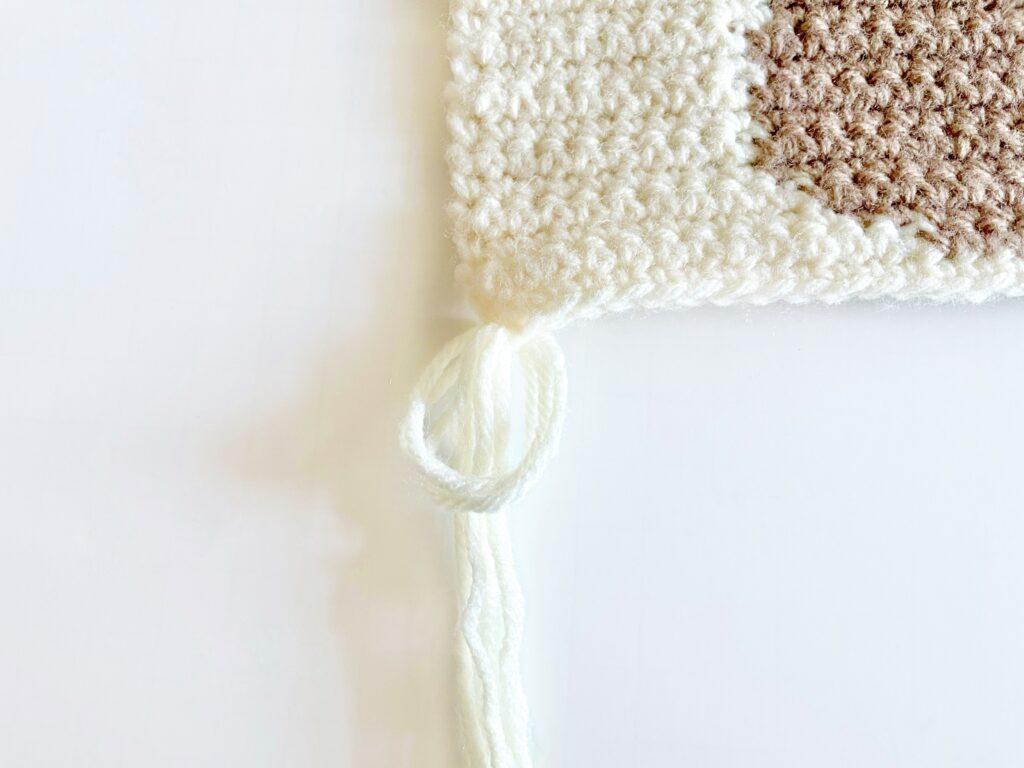
- Tighten to create the fringe.
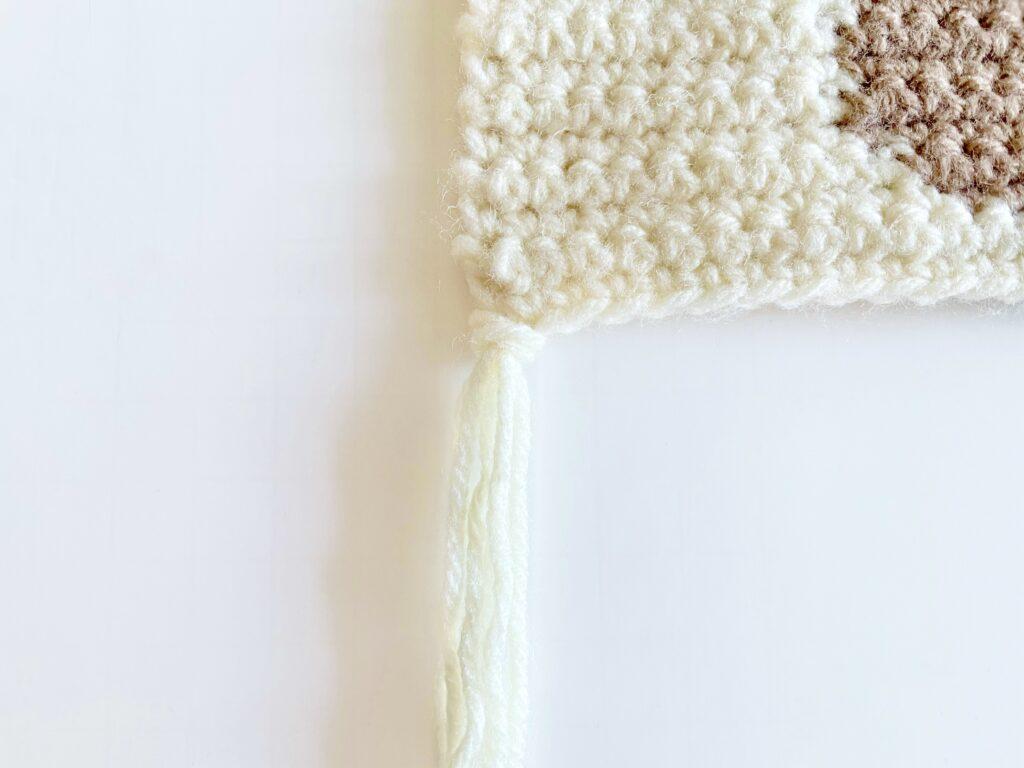
- Repeat for every other foundation chain. Trim the fringe to your preferred length.
- To hang the project, drill 2 small holes on either side of the piece.
- Thread through both holes with cotton yarn and knot off both ends.
- Trim the excess yarn.
Homeware Patterns
If you love crocheting homeware I think you’ll enjoy these patterns:
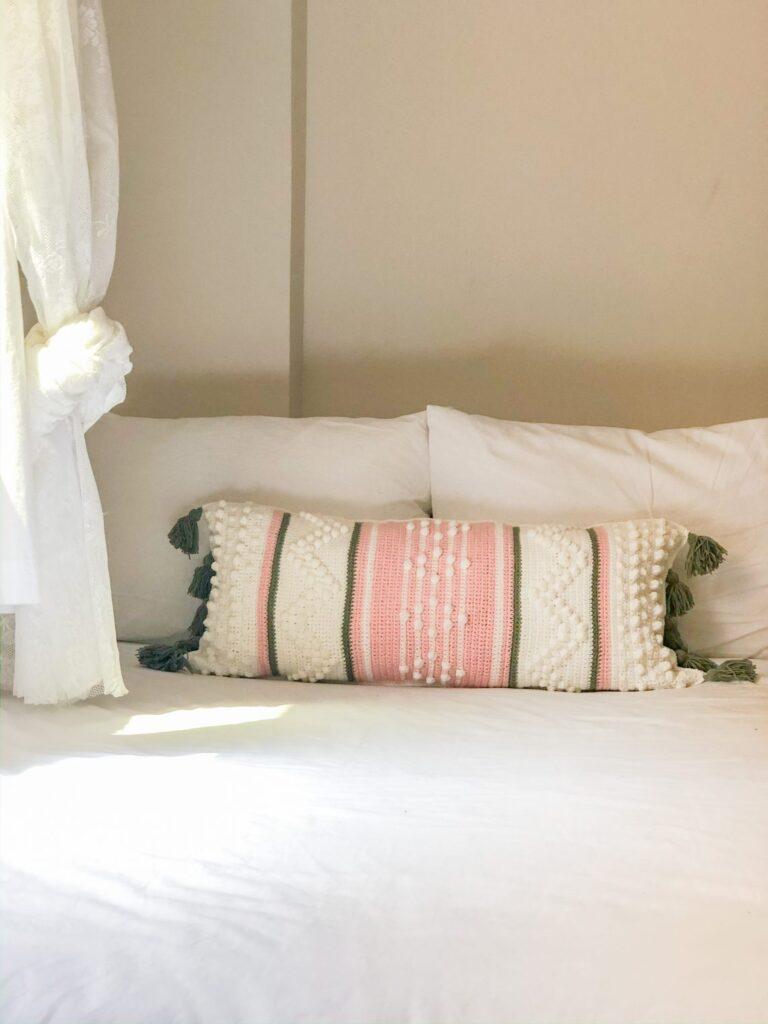 Crochet Cushion
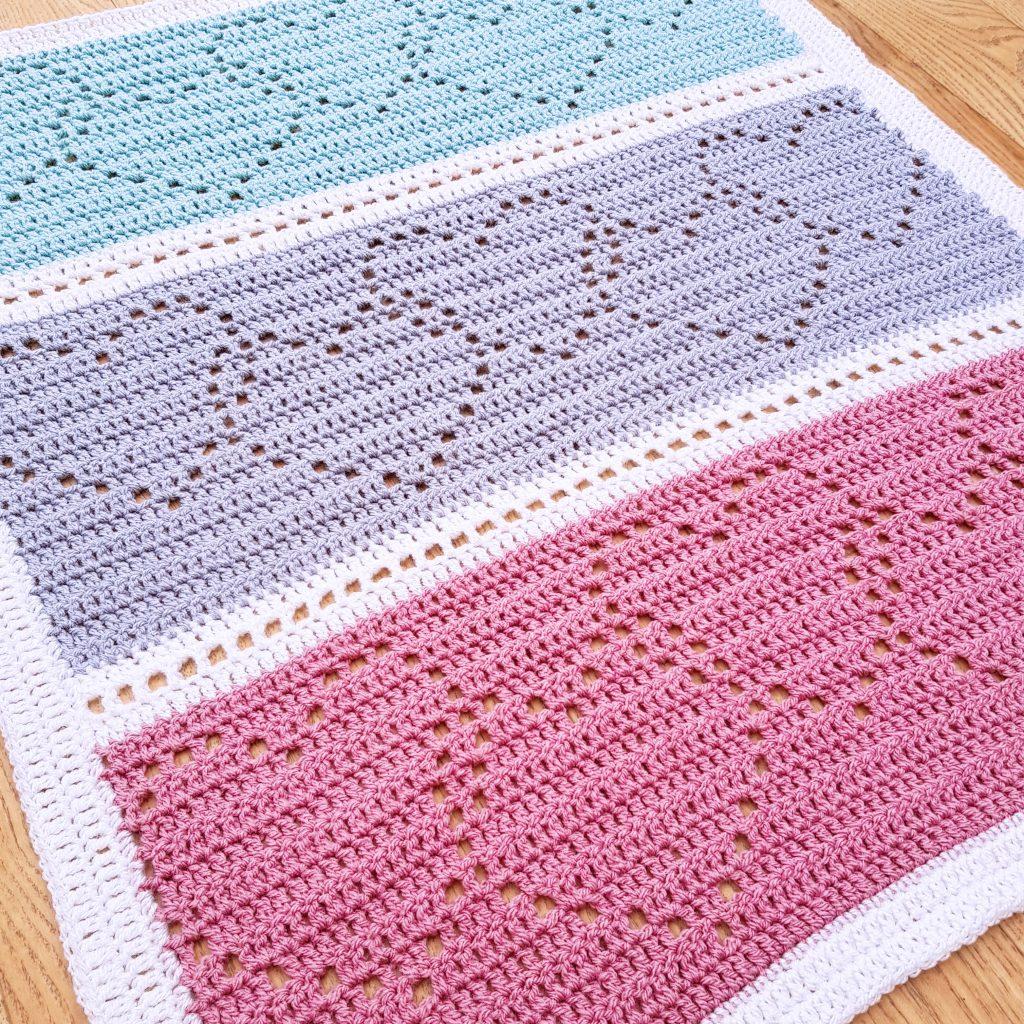 Linked Hearts Blanket
 Crochet Coaster
 Nesting Basket
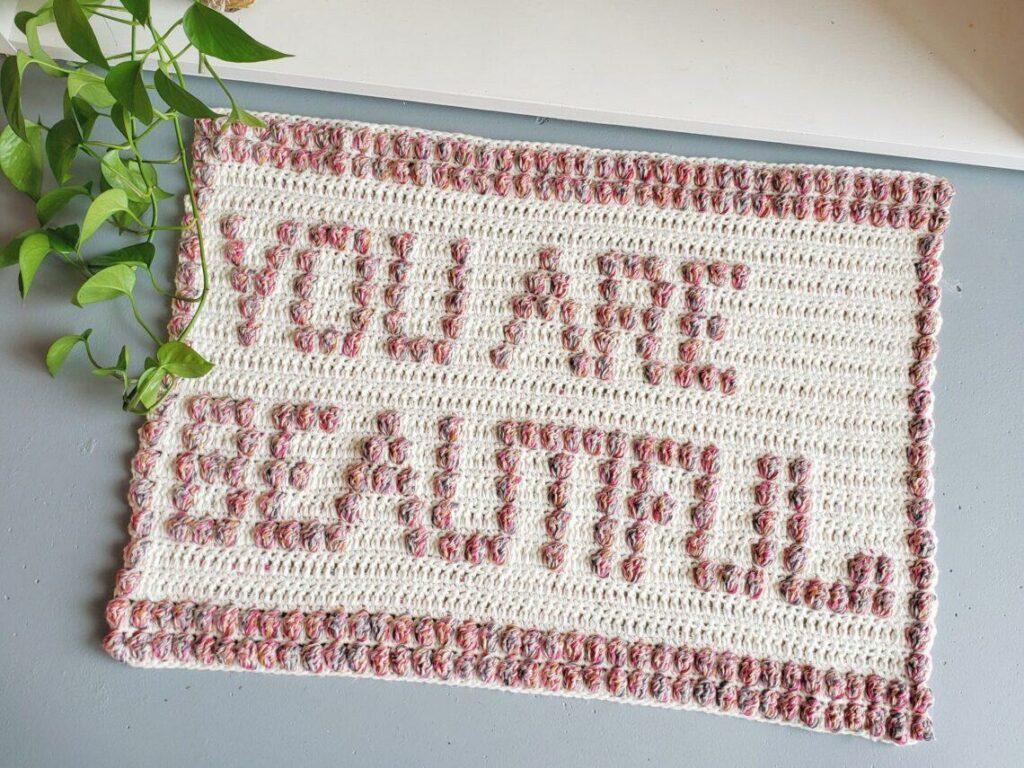 Crochet Mat
I always love to see your makes so if you try any of my patterns or follow my stitch tutorials please tag me @bellacococrochet or use the #bellacococrochet
sarah-jayne